Learning Blender
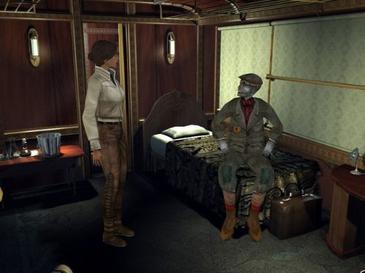
When I was doing the graphics for the T.I.M.E stories expansion, I tried out various workflows for creating the content. Looking for inspiration on how professionals make art faster, I encountered a GDC talk titled Concept Art is Dead. It claimed that no one is drawing things from scratch and everyone uses quick shortcuts like rendering a scene in Blender to get nice shadows or copying the texture from the internet instead. I tried it out to see how learning the basics of Blender may help me in creating 2D graphics.
Thoughts on 3D modeling
Having grown up playing games like The Sims (1!) or Syberia, I didn’t associate 3D graphics with high quality. Only when rediscovering games as an adult and seeing friends doing crazy realistic renders using physically based rendering did I realize the progress computer graphics made in the last couple of years.
While comparing PBR to the old graphics is not fair, as the former uses way more compute, recent improvements in hardware (like NVIDIA RTXs) narrowed the gap to the point where PBR technology becomes close to real-time.
Another part of the 3D workflow that starts to get hardware improvements is asset creation. An ability to scan a 3D object (photogrammetry), which used to be pure science fiction a couple of years back, is being made possible with advances in AI and better cameras. For example, the new iPhone includes a lidar camera, which captures not only RGB but also depth. It makes the automatic 3D model construction more accurate.
Having friends who regularly chat about computer graphics, I wanted to get more familiar with it for some time now. Making the graphics for the game turned out to generate enough motivation to actually do something.
Blender Guru tutorials
I started learning Blender by following a classic Donut tutorial by Andrew Price who also turned out to be the person behind Understanding Color and The Habits of Effective Artists, which I highly enjoyed. It’s a popular entry point for Blender, with the first video having been watched >10M times. And for a good reason: the tutorial is very approachable, yet it shows lots of elements in a short time. It regularly reminds the keyboard shortcuts, which is very useful in a complex program like Blender.

After the Donut tutorial, I watched the Lightning for Beginners but didn’t follow with any exercises.
Playing on my own
Afterward, I went to model the barrack for the time stories expansion. I took a photo from an online museum, imported it to Blender, and tried to reconstruct the model based on it. While making the whole building required some work, the modeling techniques presented in the donut tutorial were enough to create a reasonable shape.
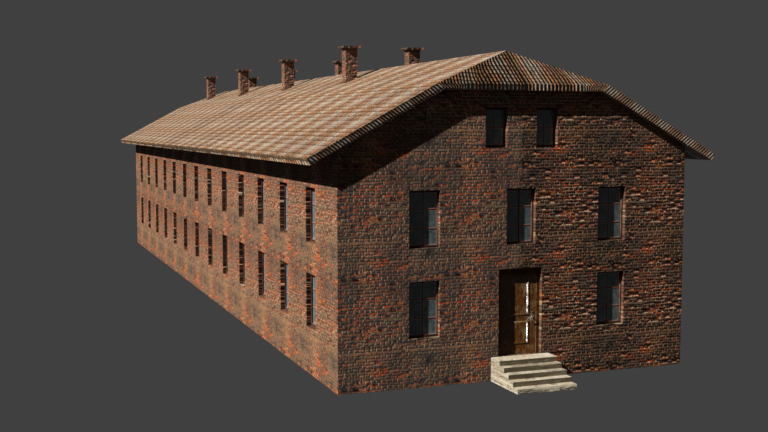
The nice part about creating the graphics in 3D was that I could reuse the single building in multiple places, creating various shots from inside, outside, between two buildings, etc. In the end, I used it in the creation of 5 scenes.
(Legally) stealing work of others
Modeling the shape of the building is only the first part of the workflow. There was a couple of smaller assets that I needed, like: the window, railing, bunk beds, etc. I wasn’t doing them on my own.
To my surprise, it’s possible to find lots of re-usable assets for free on the internet. I used these two a lot:
- sketchfab for 3D assets. A lot of ones available there are licensed with CC attribution: one can use them for any reason (including commercial use) but need to attribute the author.
- Poly Haven for “physically based” textures of various surfaces: grass, wall, brick, etc. To make the materials look good, I needed to play with the lightning and the properties of the materials’ BRDF1. I think there is a big room for improvement here, but I accepted the good-enough version of the renders.
Rigid bodies
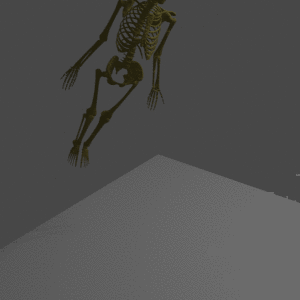
In one of the scenes in the game, I have a couple of people lying on the ground. While I was planning to not include people in the render and only paste them afterward, I considered it an opportunity to try the physics simulation that Blender has.
I thought it would be as simple as downloading one of many character models available on the internet, turning the gravity on, and seeing the bodies being animated by the engine.
While finding a model of a person wasn’t hard2, I needed to learn (or re-learn) a bit more about how the physics simulator works to make it happen. To make an object be affected by gravity, one needs to make it a rigid body. If done straightforwardly, it makes the character react to gravity but doesn’t cause it to deform when hitting other objects (it’s a rigid body after all).
Rigging
Expressing how exactly to deform a character mesh, which consists of thousands of vertices sounds very complex. At the same time, animators don’t need such granularity: they do more general things like: “raise a left arm” or “turn head to the right”, not move vertices in arbitrary directions.
To make controlling the characters easier, people create rigs. It’s a set of controls, called bones, which are connected to different parts of the character mesh in a way that if the bone moves, the corresponding vertices in the body (called “skin” in this context) are moving together with it.
This way, the animator has 10 or 20 controls that it can use, like “left arm”, and he makes the character move using them. The good characters that you can find online come “rigged”, i.e. with the rig (also called the armature) created and ready to be used.
Using bones is not trivial in the context of rigid bodies. As they are attached to a mesh but are not a proper body on their own, you cannot make a bone a rigid body to be affected by gravity. To overcome this problem, at first, I tried using the rigid bones blender add-on. It allows you to easily transform a set of bones into rigid bodies.
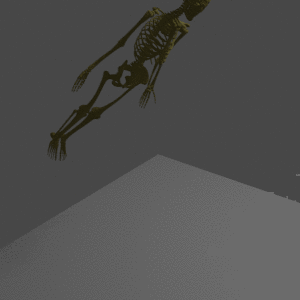
I encountered lots of problems when using this setup, with the character spinning with increasing velocity, the bones moving away in random directions, or passing through the ground.
Parent-child relationship
I tried changing some settings of the physics engine to prevent it from exploding but without success. A couple of tutorials and many hours of trial and error later, I managed to fix the problem.
A concept I understood was a parent-child relationship between the objects. In Blender, you can make one object (A) a parent of another (B), what makes A follow any transformation that B is performing.
It is a mechanism that makes the mesh follow the bones (as the armature is a parent of the object). The rigid bones add-on also uses it: it just creates a rigid-body cube around each bone and parent bone to the cube, such that the cube is affected by gravity, and bones are moving because their parents do.
Just adding the bones and the cubes around them doesn’t let the engine know that you want them to move together: Blender sees each cube as a separate rigid body and doesn’t try to keep them close to each other. To fix this, one needs to use rigid body constraints. It creates an empty (an object without mass or volume) between two cubes that constrain the movement between them. For example, one can make moving the foot backward impossible using a constraint.3
When put together, the physics simulation moves the cubes, following the constraints, the cubes are moving the bones, and the bones are moving the mesh (skin).
Summary
I found the process of learning Blender from Andrew’s tutorials really efficient, and Blender itself to be a good tool for creating the graphics that I was doing. Even when the final product is a 2D image, the 3D model is a natural “intermediate representation” where you don’t have to worry about choosing perspective, lightning, or point of view, as you can always change them at the end.
I found the Blender a very effective tool for manipulating the models. It has a lot of parts that I only barely scratched the surface of, so I will surely be using it and learning more of it in the future.